Saturday, March 24, 2012

Crochet trance

I cannot sleep at this horribly early time (5:45am!) for some reason. So, blog it is!

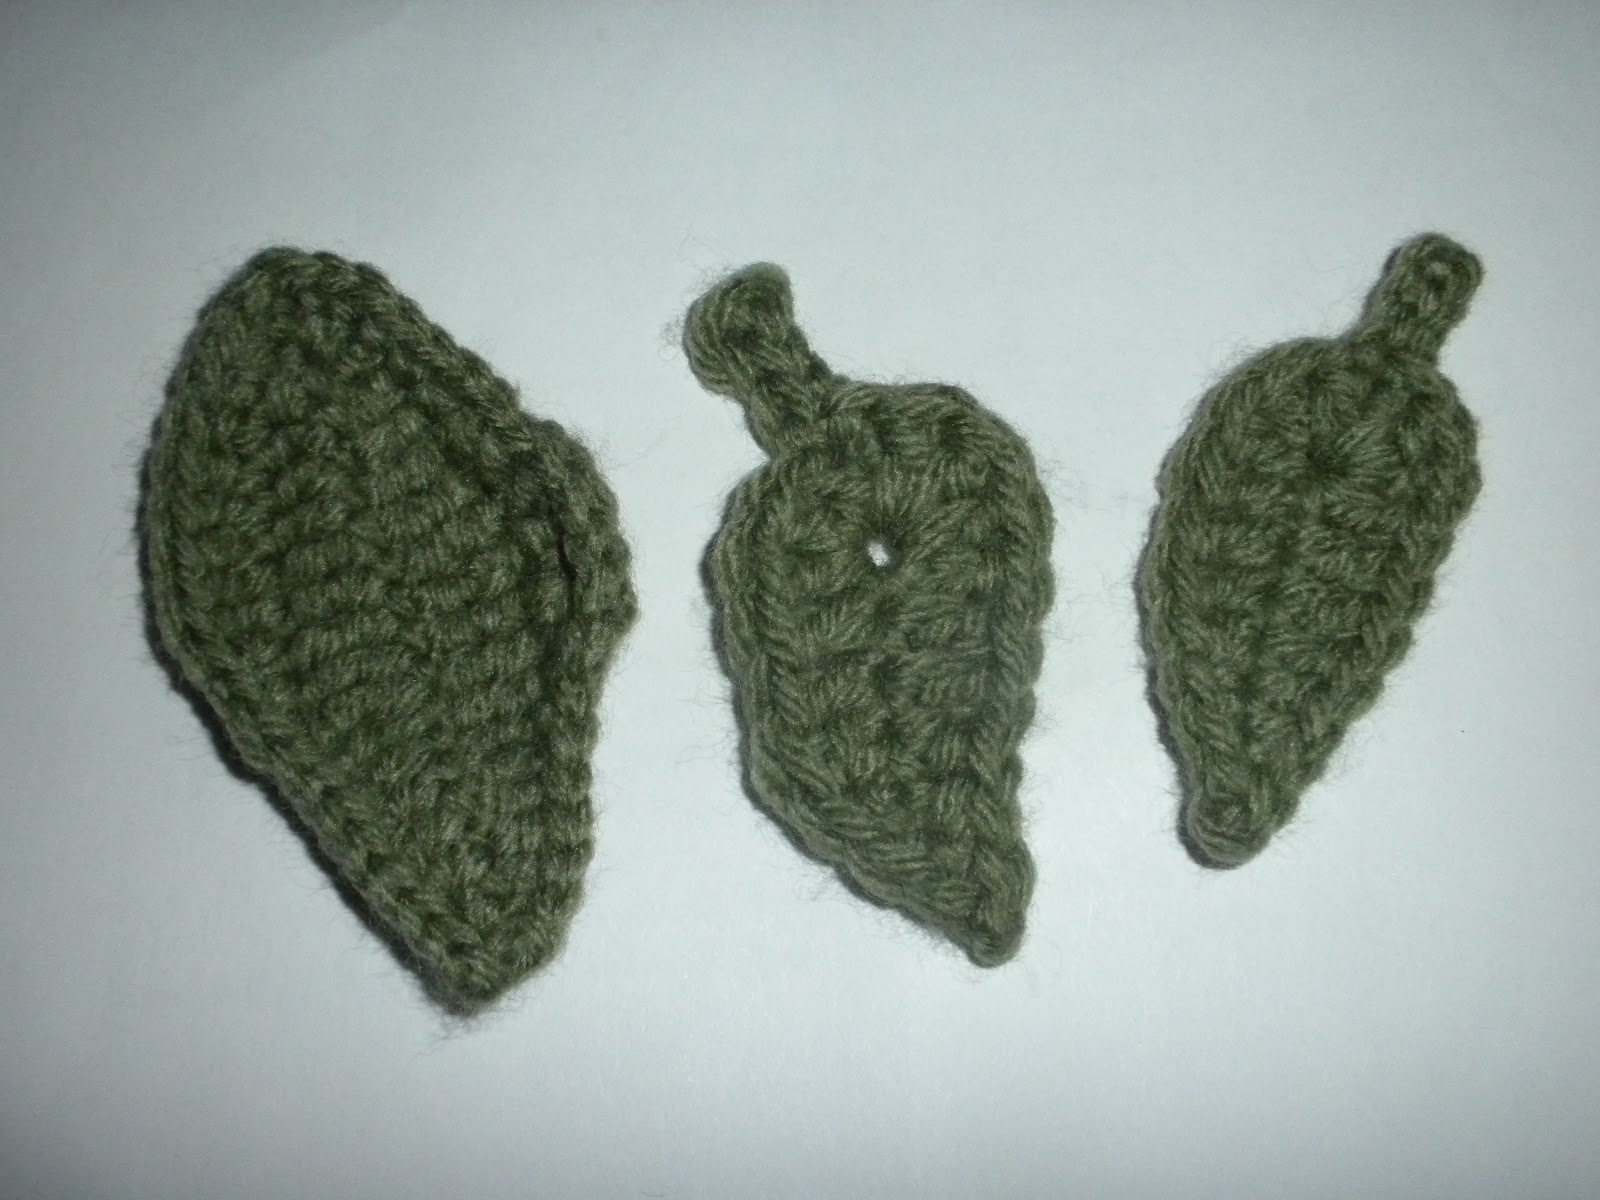
After I made my bracelet I became even more obsessed with finding jewellery patterns, if that's even possible. I was constantly searching for patterns and also crocheting like a maniac. My boyfriend called my constant evenings of crochet being in a "crochet coma" but that's way too passive, it was more like I was in a crochet trance. I couldn't stop once I'd started, I'd just go for hours. I mistakenly got the idea that Mother's Day was coming up in March, so I decided I had to made something for his mom and my mom. And I came up with my first original piece! A necklace for my boyfriend's mom :) (the leaf is obviously not my own, it's that wonderful pointed leaf from my previous post.)
I really wish I had kept track of what I was doing so I could write down the pattern. I would read other blogs when searching for patterns with comments on the creations like "I just chained a bunch..." or "I tried to write out what I was doing but couldn't..." and would think, "jeez people! don't you know I'm dying to make what you made! how hard is it to write down what you did!?"...but now I know. I'll try and re-trace my steps to actually write the pattern, so I can contribute to this wonderful free pattern sharing world :)

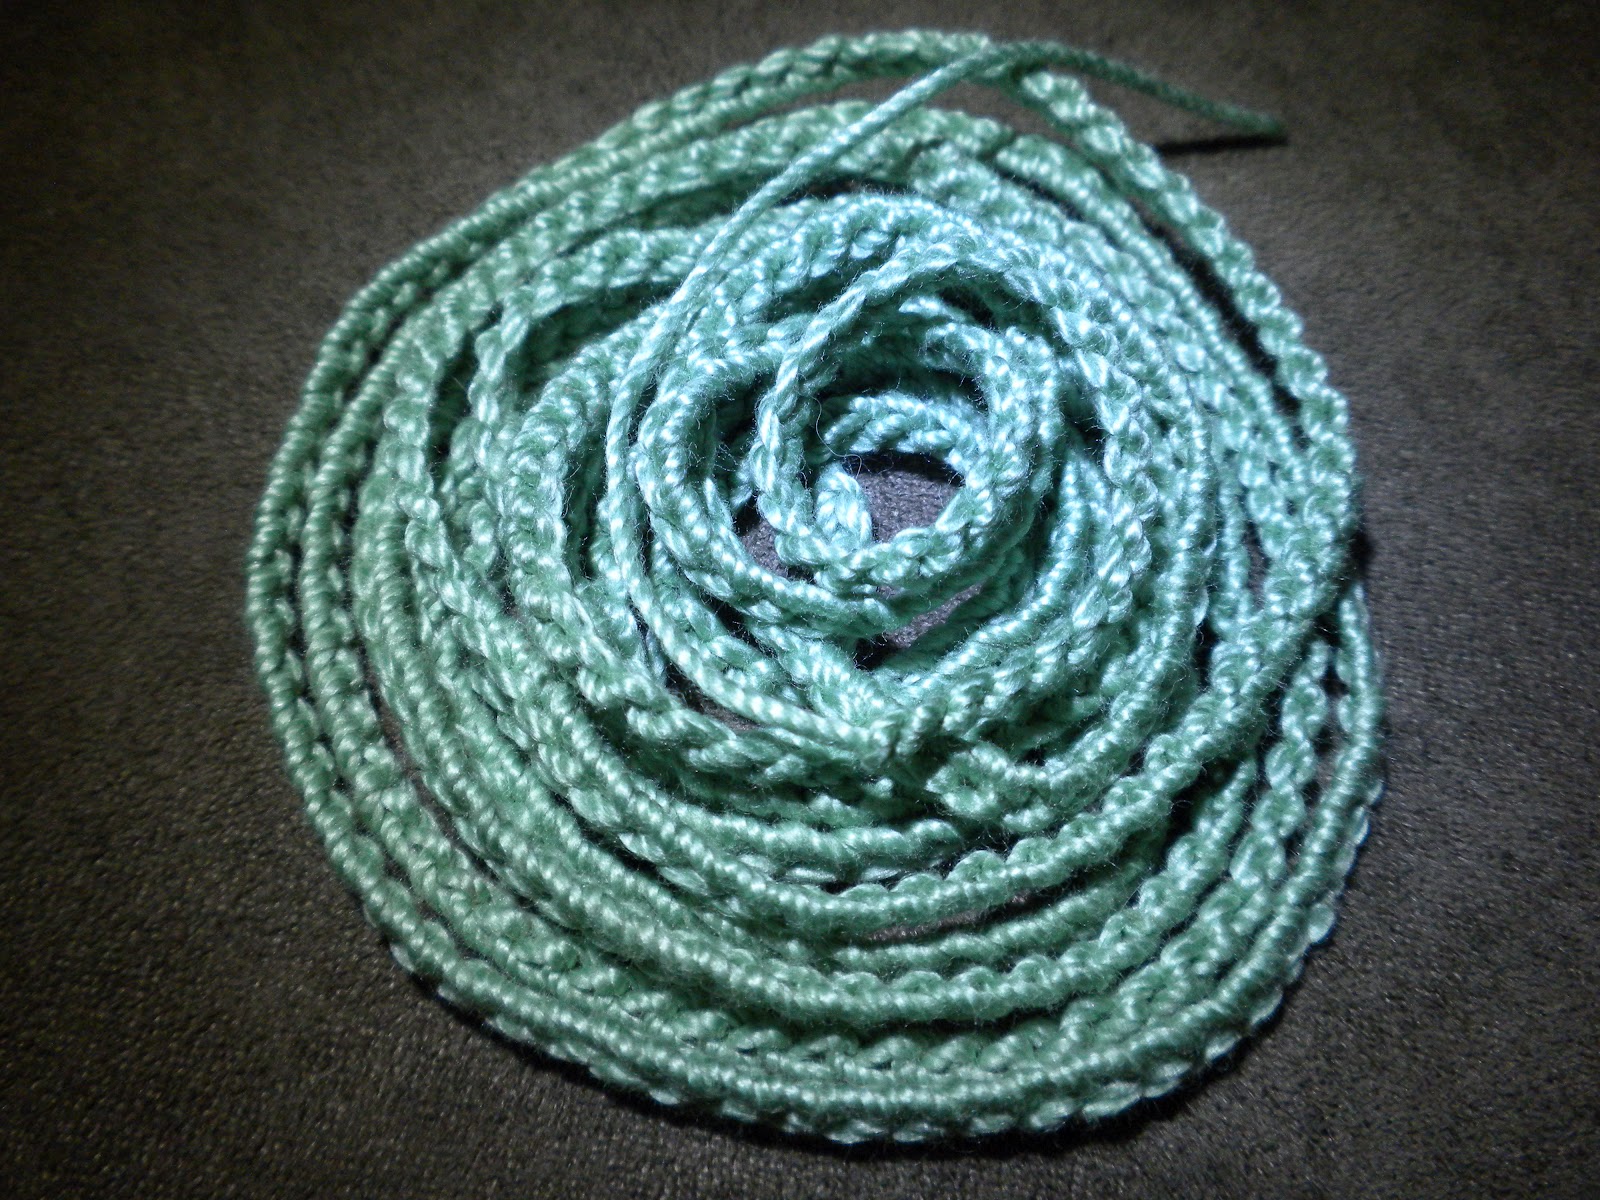
I really like when I chain with a thin, soft yarn and it does this:
The first time it happened I was a little worried, I wanted a flat chain in the end, but it flattens itself out. I'm thinking the next time this happens I'm going to try and make two, sugar water them and have some twisty, dangly earrings.

For my mom's present I found a great pattern for a decoration http://glor-crochetgalore.blogspot.ca/2010/11/victorian-motif-free-pattern.html, one of the uses is as a window decoration and I think she'll love that.
So, as usual, I added some stitches somewhere, and it wasn't laying very flat. But, this was actually my first piece that I tried the sugar and water blocking on and it worked perfectly. I also dried this between two towels with heavy things on top, so the extra stitches sort of just curled over on themselves and made two pretty little curly lumps, which I'm more than happy with. For some reason the towels didn't stick to this one, it came out nice and rigid with no fluffs stuck all over it.

I wish this was done with a thicker thread and bigger hook so that I could just use smaller thread and a smaller hook to make a pendant. I love this pattern, but it's already a size 10 thread and a 1mm steel hook, so no smaller can it go. As it is it's roughly the size of the palm of my hand. Maybe I'll just wear one as a huge pendant :P
So, even though Mother's Day isn't actually until May, I've got the presents covered.

My jewellery obsession carried on with a necklace for myself using a similar chaining method to my first, but with three graduated strands and my favourite flower pattern, and some leaf earrings using the oh so wonderful pointed leaf pattern.


I also made a necklace from this wonderful pattern http://createbellacreate.blogspot.ca/2012/01/finally-i-am-back-to-writing-posts-for.html I used a size 10 thread and a 1mm steel hook so it made a much smaller version. This is just one way I've worn it:
This uses a pre-made ribbon necklace threaded through, with a piece of labradorite I wire-wrapped hanging from the middle. Another way was with a piece of cream coloured ribbon with a hanging little green quartz and sterling silver pendant I designed and helped make. I'll take a picture of that once I wear it that way again.

The weather was nice and sunny for a while so I did a lot of balcony crocheting, with my kitty to keep me company. She LOVES being on the balcony. And the natural light means I get some nice, clear pictures of her!

And I can also get come clear pictures of my crocheting :)
Making my favourite flower, with a little help from my tea light holder to hold the pattern down; it was a bit of a windy day. I also couldn't resist a self-photo what with the sunny day, crochet, and a new haircut :)

Not a bad February day at all.

I really wanted to make something with a chunky fuscia yarn I had, and a belt seemed like a good project, so after some searching and decision making, I chose this pattern

But, after trying it on for a while, I didn't like how the shells kept curling outwards. I felt like I was wearing a tutu or something. So, it has become a sort of neck decoration, not quite a scarf but also not quite a necklace.


Then, at the beginning of March, a friend of mine got me excited about making a pair of fingerless gloves for her, and of course I whipped a pair up for myself! I completely forgot to take a picture of hers, but I definitely didn't forget to take pictures of mine. I fell in love with this pretty pattern http://bethsco.blogspot.ca/2011/11/ripple-lace-fingerless-gloves.html
And used my favourite green yarn to make a  pair.
I made them go a little longer up my fingers, and added a thumb by single crocheting in a circle until it was long enough. I think the original, without the thumb, is prettier but practically I just knew my thumb knuckle would be cold without a little coverage. These are, after all, intended for wearing while crocheting on the balcony. They keep my hands warm on those not so hot days while keeping my fingers free :)

Then I wanted to make something quick and easy, so I made an apple cozy! I used the basic pattern from this site, but without the angry face http://vegancraftastic.blogspot.ca/2009/06/angry-apple-cozy.html I love the face, but the cozy is for my boyfriend who takes apples to work a lot, and he preferred it sans face. And I also added a little leaf, of course.
I used a number 4 worsted weight yarn, and the pattern used a DK so I figured I'd use a slightly smaller hook and end up at the same size...but I should have known. Whenever I make anything it's ALWAYS smaller than the pattern, unless I use a much chunkier yarn. So....

Now, this apple was also a monster of an apple, and the cozy did pretty much fit a more regular sized apple once we had one. But with a little stretching and a lot of insistance, this cozy went on this apple.

I finally got around to making a pair of earrings to match my bracelet after this.
And to meld the best of crochet and wire jewellery making, I dangled a couple of labradorite beads from the bottom :) I'm in love all over again.

I'd been meaning to get some white crochet thread for a while, to make a little edging for a shirt. A strange stain appeared after washing a white shirt a while ago, the stain was right under the edging just under the bust. And I was so excited when I started crocheting and realized I could probably crochet something to cover it up!
So, on another nice day, I set up on my balcony, with a kitty spectator of course, and began making a simple shell edging.
For most of the patterns I've found using size 10 crochet thread, they use Aunt Lydia's Bamboo crochet thread. And I thought to myself, "what's so special about this stuff?". Well, the store I went to had one colour of Aunt Lydia's, the first time I'd ever seen it in the store, and it was white, so I figured, why not? As soon as I picked it up, I knew why everyone loves it so much! It's SO SOFT!!!!!!!!!!!
It's such a shame it's a thin thread, I just want to make a blanket out of it and pet it!
So, I need to figure out what else I can make with it, but for now I have my edging :)
The same day I made a couple leaves out of a bit thicker thread, a size 3, with a 2.5mm hook and a couple of crochet cotton squares for a small blanket, or two, to sit on the kitty's favourite places so her hair doesn't become permanently stuck in them. This way, I can just wash the blankets and save my furniture. I may have felt a little artsy when taking pictures of my leaves and squares...


Now, what to do with those pretty little leaves? Make a bracelet? Okay!


And on a not so distant evening, I decided I needed to make a long, multi-strand crochet necklace with this thread. So I set about mindlessly chaining while watching The Mentalist, made a very long chain, and then got a little artsy with the photos again :P


So, the long chain is still just a long chain, this was only a few nights ago. I think I'm going to put a clasp on the ends, make up a bunch of my favourite lotus flowers in the thinner, darker green thread, and maybe some in this same thread, sew them on, wrap it around three times and have a necklace!

PHEW! I'm all caught up to myself now! No more marathon blog posts hopefully. The sun is now up, it's been two hours and it's only 7:57am and I'm probably going back to bed now.

Thursday, March 22, 2012

More beginner adventures

It's the warmest evening March has ever seen and it's sunny, so it's a perfect chance to sit on my balcony and continue with my blog!
It feels too warm to reminisce about the hat I made in February but I'm still so proud of it, I'm going to reminisce anyway. I used the Berroco free pattern for the Phannie hat. It was my first try at a round...
I was excited to get a circle going, but I figured it should probably be flat so something must be wrong...
So I unraveled it (yes, it's easy to do but I still hate doing it) and started over. And in the end I made a hat!!! I used a medium worsted weight yarn instead of the DK that the pattern calls for, so it's not quite as slouchy as the pattern, but I'm still in love with it.
And, of course, it matches my scarf and jacket perfectly :)


At some point I realized I could probably crochet a heart...and I became obsessed with them! I made a few for valentines day, one of the patterns I used was from http://cornflowerbluestudio.blogspot.ca/2012/01/how-to-crochet-heart-photo-tutorial.html and the other, my favourite because of how bubbly it is, was from http://www.youtube.com/watch?v=s5LUk8XOYEs&noredirect=1 (the ones in the picture are all the "easiest crochet heart" from the youtube video.)


I sent a bunch out in the mail to family and friends as a little valentine's day surprise and I made a door decoration with the leftovers. I love sewing little motifs together!!
Next I thought I'd try a square. I had a plan to crochet a large-ish square and then somehow crochet around it in a different colour to made a little netbook case/purse...but I should have known when my square didn't go as planned that I was not ready for this kind of improvisation...
It was supposed to be this square http://www.allcrafts.net/fjs.htm?url=web.archive.org/web/20040405131704/http://members.aol.com/cillcrochets/springsq.html but with a chunkier yarn...Somewhere along the line I added some stitches, as usual, and did not feel like ripping it apart to find out where. So, I went as far as I could with the extra stitches and then just single crocheted around to finish off. I still think it's pretty, it's not a square, but I like it. So I tried to continue with my plan, but I just had no idea how to really do it, so I quit. This was what I ended up with, my second or third try, before I tore the green out and quit.
I just couldn't figure out how to stitch the green into the purple nicely each time I came around, and no matter what I did it kept getting too big. I wanted a tight fit for my netbook, so I would chain until it was a tight chain around the computer, but then as soon as I did my double crochets into the chain, it was way too loose. I still haven't tried again, I'll wait until I feel like being frustrated...
Next I became obsessed with making some crocheted earrings, and this is what came of it...
I'm really happy with them. I used this pattern/video http://crochet-mania.blogspot.ca/2011/03/crochet-teardrop-earring.html and it was super easy. When I went to buy the crochet thread I was a little shocked at how thin the size 10 is. I was even more shocked when I saw how tiny a 1mm steel crochet hook is! I needed a ton of light to crochet with that tiny black thread and that tiny hook but it was worth it.
Then, as I am obsessed with leaves anyway, I figured I needed to find some leaf patterns. I tried two different patterns and I like the second better. This one is really pretty in the picture http://www.crochetme.com/media/p/95203.aspx but I think as just a leaf on its own it's not what I was looking for. This one is the one I'm still using constantly http://windrosefiberstudio.blogspot.ca/2011/08/veined-leaf-free-crochet-pattern.html
These are the comparisons of my first few leaves, the largest is from the first pattern and the other two are from the second, made with different sized hooks.

Next I wanted to make more jewellery with the tiny black thread and the tiny hook, and I found this beautiful bracelet pattern! http://www.crochetme.com/media/p/94629.aspx
I LOVE this flower! And I love the bracelet I made :)
I improvised a beaded toggle instead of the two buttons just because I didn't have two pretty little matching buttons. The bracelet sort of curled when I wore it a while, probably because of the toggle rather than the buttons, so I went about finding a decent homemade blocking solution because I don't own an iron or ironing board so starching won't work. I found a great site about different stiffening techniques http://www.crochetmemories.com/crochet8.php and I tried the equal parts sugar and water and it worked great for this bracelet. Caution though- I dried it between two towels with some heavy things on top so it would be nice and flat, but the towels were light in colour and the first time I did this I had to peel it off the towels and the fluff stuck to it. So I had to rinse it out and do it again, this time I just let it dry on some wax paper because it was pretty flat. And it turned out great. Also, instead of dipping the whole piece in the solution and trying to get as much liquid out without wringing, I just used a little silicone sauce brush to brush the solution all over both sides intil it was damp but not soaking. I like this better I think because I'd be really worried about not getting enough liquid out or stretching it trying to get the liquid out. This way I can just brush on enough that I'm comfortable with and that doesn't seem like it's too much liquid for the piece to hold.

Well, the sun's going down and it's getting too cool out here for my tank top and bare feet, so I'm going to call it a day on this blog update.


Monday, March 19, 2012

Hello blog world

This is my first ever blog post :) I've been meaning to start a blog for a while. I started crocheting a few months ago and found myself creating a sort of picture diary of the experience. This isn't really strange for me, I take pictures of EVERYTHING but I also thought it would be nice to have a place to explain the pictures. So, here it is. I also make jewellery, mostly from wire and beads, so this is a mixed-craft blog. I'll probably also be posting a lot of things about my cat, Wernicke, as she is so amusing. Anyway...I'm going to start from my crochet beginning :)

This is my second-ever crocheted piece (the first is two very bad rows of single crochet, not worth a picture). It was supposed to be the body of a stocking...apparently I crochet quite tightly. So, to mix crochet with my love of jewellery, it is now a cuff. A good compromise I think :)

My second attempt didn't go as well as I'd hoped it would, it was a larger red rectangle but not as large as I wanted and a little wavy on the ends...
...but I'm still proud of it :)

Next I started on a scarf for my boyfriend. I figured it was an easy thing to do (the pattern for the stocking confused me, I still find some patterns hard to read but it was a mistake to try a multi-piece thing from a pattern when I'd just started. I had no idea what I was reading so I got really frustrated and discouraged.) and a great way to practice my double crochet. I just looked up a really simple pattern to get an idea of how to start, made a chain the width I wanted, and dc'd from there. A little early morning crochet by the Christmas tree lights was super relaxing.
All the beginner tips I'd read online warned against using a dark yarn to start, because it's harder to see the stitches. I thought "pfft, can't be that hard"...I was wrong. This yarn was also fuzzy so I couldn't see the stitches at all. But I could feel them, which was lucky, so I worked away because it was the yarn my boyfriend chose. And I used up the whole ball of yarn to get one wicked scarf :P

I was pretty confident in my double crochet abilities so I set out on a scarf of my own.
And then I got bold and decided to add a border, to make my scarf match a coat I'd just bought.

I thought it was going to be harder to add a colour in, but it was actually pretty straightforward. And voila! A yellow scalloped trim on a royal blue scarf :) The trim pattern is from http://www.woolcrafting.com/crochet-scallop-edging.html
It matches my bright yellow and royal blue coat! yay!

So those were a few of my first crochet items. Next up: some non-scarf things!